Ingredients
FLOUR 0
500 grams
WARM WATER
350-370ml
DRY BEER’S YEAST
2 grams
SALE
2 teaspoons
EXTRA VIRGIN OLIVE OIL
2 tablespoons
YOU NEED IT TOO
FLOUR
qb
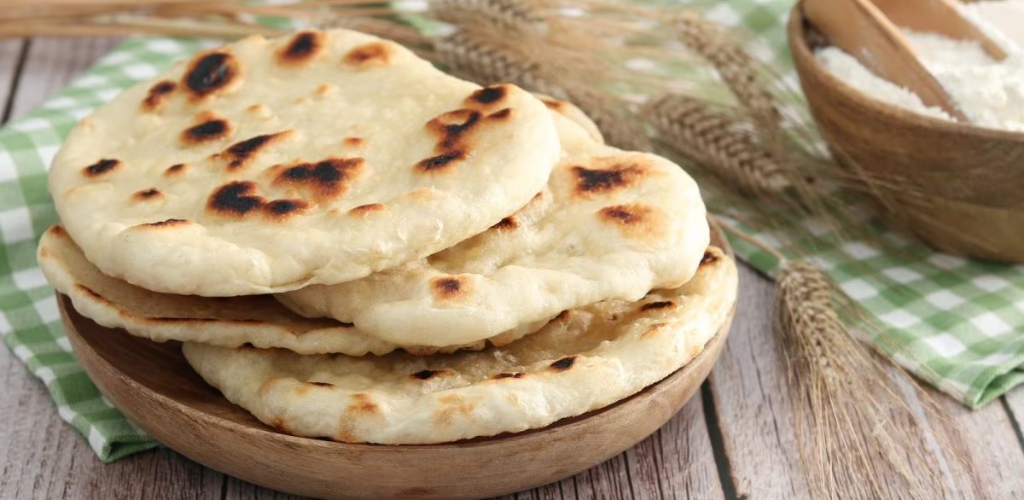
Pita is a thin, circular, double-leavened bread typical of Greek and Middle Eastern cuisine. Preparing it is very simple. Simply collect the flour with the yeast in a bowl, add the warm water, little by little and until completely absorbed, the oil and salt, and work everything on a lightly floured work surface. The mixture obtained, once fermented, will be divided into numerous discs of about 100 g each that will be left to rest again and then cooked in the oven or in a pan: the result will be light and fragrant buns, ideal to enjoy hot in the moment, accompanied by the most varied ingredients, or prepared in advance and taken to the beach or during a trip out of the city.
Soft in texture and neutral in flavor, pita is perfect to accompany mild dressings and sauces such as hummus or babaganoush, or to wrap falafel, kebab or gyros, the traditional Hellenic street food based on pork loin and tzatziky sauce. It can also be filled, like a piadina, with raw ham and squaquerona, roasted vegetables, salmon and avocado… Or used instead of bread in combination with salads or any meat or fish preparation.
In our recipe we use dehydrated brewer’s yeast, but you can easily replace it with 6 g of fresh yeast: in this case, before adding it to the flour, you will have to dissolve it in 1 cup of warm water.
Discover how to prepare pita following the step-by-step procedure and tips.
How to prepare pita
Step 1
Collect the flour in a bowl.
1
.
Step 2
Add the dry brewer’s yeast.
2
.
Step 3
Pour a drop of water
3
.
Step 4
Mix with a spoon
4
.
Step 5
And continue adding the water, little by little and stirring constantly.
5
.
Step 6
Add oil
6
and mix it with the rest of the ingredients.
Step 7
Place the dough on a lightly floured work surface.
7
.
Step 8
Spread the dough with your hands, add salt.
8
and continue kneading.
Step 9
Take one piece of dough and fold it in half, then overlap the other piece on top of the already made fold.
9
.
Step 10
Work again until you obtain a smooth and homogeneous mixture.
10
.
Step 11 Transfer the dough to a bowl ,
brush the surface with a splash of oil, cover with transparent film and let it rest at room temperature, away from drafts, for about 2 hours.
Step 12
Once the initial volume has doubled
12
, take the dough again.
Step 13
Remove the transparent film.
13
.
Step 14
Gently deflate the dough
14
with your fingers.
Step 15
Place the dough on the floured work surface.
15
.
Step 16
briefly work
sixteen
With your hands.
Step 17
Divide the dough into 8-9 loaves.
17
of approximately 100 g each.
Step 18
Form many balls with the dough.
18
.
Step 19
Roll out each ball until it forms a thin layer with the help of a rolling pin.
19
.
Step 20
form a disk
20
.
Step 21
And continue like this until you run out of dough.
21
. Once finished, cover with plastic wrap or a damp cloth and let it rest for half an hour.
Step 22
To cook in a pan. Brush each disc on both sides with oil.
22
.
Step 23
Place it in a non-stick pan.
23
very hot.
Step 24
And let it cook until the dough begins to swell and many bubbles form on the surface.
24
.
Step 25
Gently flip the pita with the help of a spatula.
25
.
Step 26
And let it cook on the other side as well until it browns slightly.
26
.
Step 27
Continue in this way until you run out of ingredients.
27
.
Step 28
To cook in the oven. Place the dough discs on a baking tray lined with baking paper, brush them with a splash of oil.
28
and cook in the lower part of the oven at 250°C for about 10 minutes.
Step 29
Once the cooking time has elapsed, remove from the oven.
29
.
Step 30
Bring the pita to the table, cooked in the oven and in the pan.
thirty
and serve with salty ingredients to taste.
storage
Pita can be stored at room temperature, in a paper bag or wrapped in plastic wrap, for a maximum of 1-2 days. To make it fragrant again, we suggest heating it on a griddle when serving.