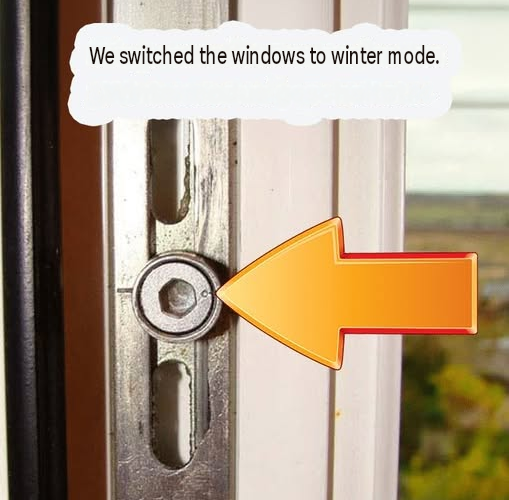
UPVC windows can be quickly adjusted yourself using a 4 mm Allen key. The most common cause of drafts is insufficient contact pressure or slight warping of the window sash.
- Adjusting the contact pressure (winter mode)
On the side of the open window sash, you’ll find round or oval metal pins, called roller cams (eccentric cams).
Locating the cams: They are located along the edge of the window sash.
Checking the markings: There is usually a small dot, notch, or line on the cams.
Adjusting:
Winter mode (stronger pressure): Turn the cam with the Allen key so that the notch or the thicker side of the oval faces inwards (towards the room/seal).
Summer mode (weaker pressure): The notch faces outwards (towards the windowsill/track).
Important: Adjust all cams evenly along the sash.
- Adjusting the Sash (in case of rubbing or drafts)
If the window is sagging or rubbing against the frame, the adjustment screws on the hinges will help.
Lower Corner Hinge (Height & Side Adjustment):
Remove the cover cap.
Insert the Allen key from above: Turning clockwise raises the sash, counterclockwise lowers it.
Turn the side screw on the hinge to move the bottom of the sash left or right.
Upper Hinge (Top Side Adjustment):
Open the window. Turn the side screw on the upper hinge to pull the top corner closer to the hinge or push it away.
Quick Test & Maintenance
Tilt a piece of paper inside the closed window. If it can be easily pulled out, the contact pressure is too low. If adjustment is insufficient, the rubber seals should be cleaned and treated with silicone spray or replaced.