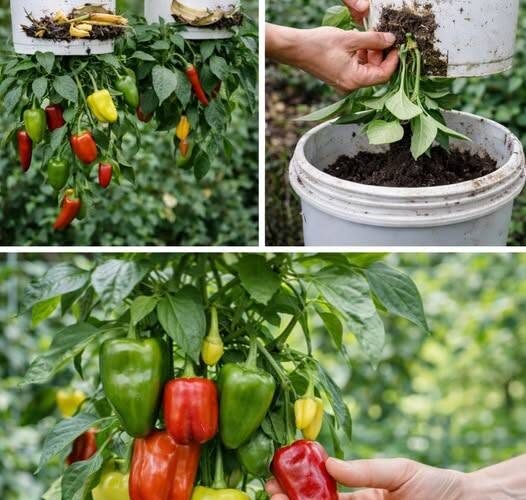
Growing peppers and tomatoes upside down is a fascinating gardening trend that offers some very practical advantages – even if the claim that you automatically harvest more fruit this way is, botanically speaking, a bit of a myth.
Here’s a fact check and a simple guide on how this surprising method works in your garden or on your balcony.
Why Grow Peppers Upside Down? (The Advantages)
It might sound unnatural at first, but the method has real logistical benefits:
Space saving: Perfect for small balconies or patios. The ground remains free for lettuce, herbs, or flowers.
No supports needed: Pepper plants can become heavy under the weight of their fruit and break. When they hang downwards, gravity does the job – no tying is necessary.
Fewer pests and diseases: Since the plant has no contact with the soil, slugs and soil-borne fungi (like the dreaded late blight) have little chance. In addition, ventilation is excellent.
No weeds: There’s simply no room for pesky weeds in a hanging bucket.
The reality check: The claim that this method results in a larger harvest is usually not true. Peppers love sun and warmth. Because the roots have less space in the bucket and dry out faster than in a garden bed, this method requires excellent care to achieve the same yield as a regular plant.
DIY instructions: Peppers in a hanging bucket
You don’t need expensive special equipment from the hardware store. A normal, clean plastic bucket is perfectly sufficient.
What you will need:
A sturdy plastic bucket (approx. 10 liters) with a handle
A strong young bell pepper or chili plant
High-quality, nutrient-rich potting soil for vegetables or tomatoes
Some coffee grounds, a piece of fleece, or newspaper
A drill or utility knife
Step-by-step instructions:
Drill the hole: Turn the bucket upside down and drill or cut a hole approximately 3 to 5 cm in diameter in the center of the bottom.
Prepare the plant: Remove the bell pepper plant from its pot. The root ball should be moist, but not soaking wet.
Threading the plant: Carefully wrap the root ball in a piece of newspaper or fleece (this protects the leaves). Now, guide the plant from the inside out through the hole in the bottom of the bucket, so that the green shoots hang out and the root ball rests in the bucket.
Prevent it from slipping out: Place a small piece of fleece or some moss around the plant stem right next to the hole. This prevents the soil from spilling out later.
Filling with soil: Gently hold the plant from below and carefully fill the bucket with potting soil. Press the soil down lightly, but leave about 5 cm of space at the top for watering.
Hanging and watering: Hang the bucket on a very sturdy hook in a sunny, sheltered spot. Now water the plant thoroughly from above until water starts to drip out the bottom.
3 Essential Care Tips
To ensure the experiment is a complete success and you reap a bountiful harvest, you need to pay attention to two things that differ from a regular garden bed:
Water is crucial: Soil in hanging containers dries out extremely quickly because of the wind from all sides. In the height of summer, you need to water the peppers daily (sometimes even morning and evening).
Fertilize regularly: Frequent watering quickly leaches nutrients out of the soil. Starting when the plant begins to flower, mix an organic liquid fertilizer (e.g., tomato fertilizer) into the watering can once a week.
The “light effect”: The pepper plant’s shoots will try to bend upwards towards the light. This is perfectly normal and gives the plant an interesting U-shape. Make sure the lower part of the plant also gets enough sun.
Extra tip for clever gardeners: You can use the open top of the bucket to plant shallow-rooted herbs (like basil or parsley) or lettuce. This way, you make double use of the space.