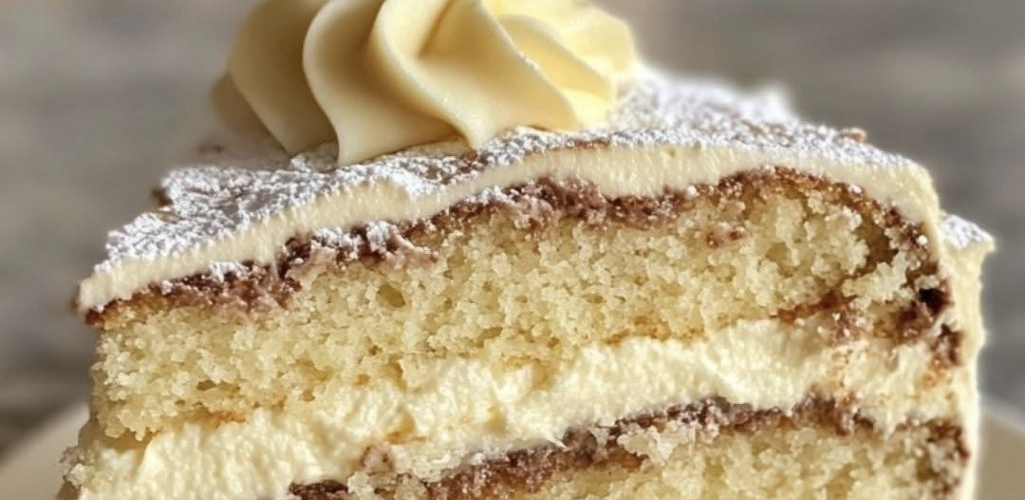
That is a wonderful request! Grandma’s best buttercream cake from the 1950s is a true classic. The recipes from that era were known for their tender, moist crumb (often using Crisco or butter blends) and, most importantly, the rich, snow-white American Buttercream (often called Fluffy Frosting or Decorator’s Frosting) that was sturdy, sweet, and perfectly pipeable.
This recipe focuses on a tender vanilla cake and a traditional, stable American Vanilla Buttercream from the era.
👵 Classic $1950 \text{s}$ Grandma’s Buttercream Cake
This makes a high, two-layer $8 \text{ inch}$ cake perfect for celebrations.
📋 Ingredients
I. The Tender Vanilla Cake (Layer Cake)
| Ingredient | Quantity | Notes |
| All-Purpose Flour | $2 \text{ cups}$ | |
| Granulated Sugar | $1 \text{ 1/2 cups}$ | |
| Baking Powder | $2 \text{ teaspoons}$ | |
| Salt | $1/2 \text{ teaspoon}$ | |
| Butter (softened) | $1/2 \text{ cup}$ ($115 \text{ g}$) | Unsalted. |
| Vegetable Shortening (e.g., Crisco) | $1/4 \text{ cup}$ ($55 \text{ g}$) | The secret to 50s tenderness! |
| Milk | $1 \text{ cup}$ | Room temperature. |
| Eggs (large) | 2 | Room temperature. |
| Vanilla Extract | $1 \text{ tablespoon}$ | Use high-quality vanilla. |
II. Classic American Buttercream
| Ingredient | Quantity | Notes |
| Powdered Sugar (Icing Sugar) | $4 \text{ cups}$ | Sifted. |
| Butter (softened) | $1/2 \text{ cup}$ ($115 \text{ g}$) | Unsalted. |
| Vegetable Shortening | $1/2 \text{ cup}$ ($115 \text{ g}$) | Essential for structure and whiteness. |
| Milk (or Cream) | $3 \text{ to } 5 \text{ tablespoons}$ | Adjust for consistency. |
| Vanilla Extract | $1 \text{ teaspoon}$ | |
| Pinch of Salt | Balances the sweetness. |
🛠️ Instructions
I. Bake the Cake
- Preheat & Prep: Preheat oven to $350^\circ\text{F}$ ($175^\circ\text{C}$). Grease and flour two $8 \text{ inch}$ round cake pans.
- Combine Dry: In a medium bowl, whisk together the flour, baking powder, and salt.
- Cream Fats: In a large bowl, beat the softened butter and shortening together until light and fluffy. Gradually add the sugar and beat for $3 \text{ minutes}$.
- Add Wet: Beat in the eggs one at a time, followed by the vanilla.
- Alternate: Reduce speed. Gradually add the dry mixture alternately with the milk, beginning and ending with the dry mixture. Mix only until just combined (do not overmix!).
- Bake: Divide the batter evenly between the prepared pans. Bake for $25 \text{ to } 30 \text{ minutes}$, or until a toothpick inserted in the center comes out clean.
- Cool: Let cool in the pans for $10 \text{ minutes}$ before turning out onto a wire rack to cool completely.
II. Make the Buttercream
- Cream Fats: In a large bowl, beat the softened butter and shortening until light and fluffy.
- Add Sugar: Gradually add the sifted powdered sugar, alternating with the milk (or cream) and vanilla extract.1 Start slowly to avoid a cloud of sugar!
- Whip: Once all ingredients are incorporated, beat the frosting on high speed for $3 \text{ to } 5 \text{ minutes}$. This is the secret to making it light and fluffy. Add more milk, $1 \text{ teaspoon}$ at a time, until the desired spreading consistency is reached.
III. Assemble
- Level (Optional): Once the cakes are completely cool, use a serrated knife to level the tops if necessary.
- Fill & Crumb Coat: Place one cake layer on your serving plate. Spread a generous layer of buttercream on top. Place the second layer on top. Apply a thin, light layer of frosting to the entire cake (the “crumb coat”) to seal in any loose crumbs. Chill for $15 \text{ minutes}$.
- Final Coat: Apply the remaining buttercream generously and decorate as desired!
Enjoy this timeless piece of baking history!